


If you’re ready to finish your basement or any room, one of the final steps is to install drywall. With every wall framed and all plumbing, electrical, and wiring in place, it’s time to transform that framework into walls. Follow these steps to cut, hang, and install drywall easily.
Tools You’ll Need
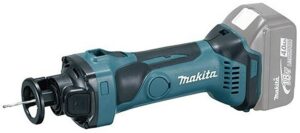
To get started with cutting drywall, having the right tools makes all the difference. For this project, the Makita Cordless Drywall Cutout Tool and Makita Cordless Drywall Screwdriver are ideal for fast, accurate, and seamless drywall cutting and installation.
Plan Your Drywall Layout
The first step in any drywall installation is planning. Outline the room and mark areas where you’ll need to make cutouts for electrical outlets, switches, and ceiling fixtures. Your goal should be to use as many full sheets of drywall as possible to reduce seams, saving you time when taping and mudding later on.
How to Cut Drywall for Outlets and Fixtures
For the first sheet of drywall, position it horizontally along the wall where it will be installed. Measure for cutouts by marking the location of plugs, outlets, or switches on the drywall. Using the Makita Cordless Drywall Cutout Tool, make accurate cutouts by following these steps:
- Measure and Mark: Measure from the nearest wall and from the floor to the desired cutout location. Transfer these measurements to the drywall sheet.
- Cut: Adjust the depth of your cutout tool to avoid cutting too deeply. Start in the center of your marked outline, then work your way to the edge to follow your marked lines. This approach reduces the risk of tearing or overcutting. Now, you have your first cutout completed!
How to Cut Full Sheets of Drywall
If you need to cut a full sheet for a wall or ceiling, measure and mark two points on the drywall to ensure a straight line. Use a T-square to keep your cuts straight, then use the Makita Cordless Drywall Cutout Tool to follow your marked line, creating a precise cut ready for hanging.
How to Hang Drywall Properly
To install drywall, position each sheet with a small 3mm gap on all sides to prevent buckling from temperature changes. Next, grab your Makita Cordless Drywall Screwdriver, set to avoid over-driving screws. Place screws 40.5 cm apart along wall studs or every 30.5 cm for ceiling sheets. Begin at the top and work your way down, securing the drywall sheet evenly to ensure it stays flush with the wall.
Cutting Drywall for Overhangs, Windows, and Doors
For areas with overhangs or windows, use the drywall cutout tool to make precise adjustments. If necessary, adjust the bit’s length so it doesn’t go too deep. Start in a marked area, and follow your outline to remove the cutout piece. For straight lines along studs, use the extra length on the bit to guide the cut, creating a clean, even edge.
Repeat these steps for each wall and ceiling section, and soon, your room will be ready for mudding, sanding, and painting. With these tools and techniques, you’ll be able to cut, hang, and install drywall like a pro.
FAQs:
- How do you measure drywall cutouts accurately?
Measuring accurately is essential for smooth drywall installation. Use a tape measure to measure from nearby walls or the floor to the center of each outlet or switch, and transfer these marks onto the drywall sheet. - What tools are best for cutting drywall?
The Makita Cordless Drywall Cutout Tool is ideal for making cutouts, while a T-square ensures straight cuts. A cordless drywall screwdriver speeds up the hanging process and helps prevent screws from damaging the drywall.