Skip to Content
Proud Sponsors of: cfl logo
Air Miles Logo
My Store: Hickey's TIMBER MART (Conception Bay South)
Today's Hours: 8am - 5pm
My Store: Hickey's TIMBER MART (Conception Bay South)
fr
In this issue:

How to insulate a crawlspace

Presented by

An uninsulated crawlspace might mean your heating system needs to work extra hard to keep your home warm enough. Not only will this drive up your energy costs, but it also means the crawlspace is likely lacking a vapour barrier — leaving your floor joists exposed to mold and rot.

Luckily, insulating your crawlspace is an easy project — and a stellar way to make your entire home feel more comfortable while also saving on energy costs.

Let’s put on our safety masks and dive in …
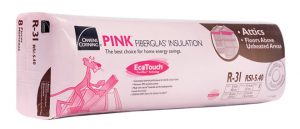
An image of Owens Corning Pink Fiberglas Batts in the package

How to insulate a crawlspace if it’s unconditioned
(not heated or cooled)

Adding fibreglass insulation — like Owens Corning PINK® FIBERGLAS™ batts — between the joists in an unheated crawlspace prevents cold air from rising up into the floor.

  • Install the insulation from one end of the house to the other, making sure the vapour retarder is towards the warm side of the structure. (In a vented crawlspace, the warm side is usually closest to the floor.)
  • Make sure the insulation goes all the way back so it touches the band joist, providing complete coverage under the house.
  • Insulate carefully around electrical wiring, electrical boxes and water pipes.
  • Use insulation hangers, furring strips or nylon straps to provide support and hold the insulation in place around the joists.
  • Spread a 4-6 mm polyethylene vapour retarder so it completely covers the ground — preventing moisture from seeping into the crawlspace. Use rocks or bricks around the edges to hold it in place.

How to insulate a crawlspace if it’s conditioned
(heated or cooled)

Whether your heated crawlspace has uninsulated ducts or water pipes, it’s important to insulate the walls in order to reduce energy loss. We suggest using Owens Corning EcoTouch® PINK® FIBERGLAS™ insulation batts.

  • Measure and cut small pieces of insulation and fit them into the band joist (area above the foundation wall).
  • Cut long pieces of insulation that can completely cover the crawlspace wall, and wedge them snugly into the joists. Ideally, you want the insulation to extend out onto the ground by 1-2 feet.
  • Attach the insulation to the wood plate, located at the top of the foundation, with cap nails (or standard nails with long furring strips). Only drive the nails into the plate partway, so you avoid compressing the insulation too much.
  • Spread a 4-6 mm polyethylene vapour retarder so it completely covers the ground, using rocks or bricks around the edges to hold it in place.

Simple enough, right? Of course, if you have any questions, we’re always happy to help. Just stop by your local TIMBER MART to learn more.

How to insulate basement walls

Presented by

Basements naturally have a lot of moisture, which can cause mold and mildew. They can also be cold spaces that spike your energy costs as your home works overtime trying to keep them at a comfortable temperature.

Not all basements are adequately insulated, but because of changing building codes, basement wall assemblies are now requiring more insulation than ever before.

That’s good news for homeowners because proper basement insulation makes for a more comfortable living space. Start planning your basement project by using continuous rigid insulation and an installer-friendly friction fit batt insulation between the studs. When combined, these products improve your home’s thermal performance, making your basement the envy of your neighbors, and can reduce your energy bills.

Ready to start? Whether you’re working with a brand-new basement or you’re insulating an existing basement, let’s take a closer look at how to insulate basement walls…

Install your insulated sheathing board.

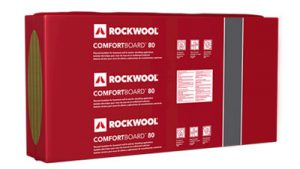
Image of Rockwool Comfortboard 80 in the package.

Start by installing a rigid stone wool insulation sheathing board like ROCKWOOL Comfortboard® 80. It’s non-combustible, water-repellent, fire-resistant, and sound absorbent — providing a continuous layer of insulation around your basement’s interior foundation wall.

For a concrete wall, you’ll need concrete fasteners with washers (so they don’t go through the insulation, keeping the board tight to the foundation wall). It should only take 5-6 nails to put up a full sheet. Cover the whole wall, making sure the boards fit together snugly without any gaps. If the boards are a bit too long, trim them down with a serrated knife — it cuts just like bread!

Insulate between the studs.

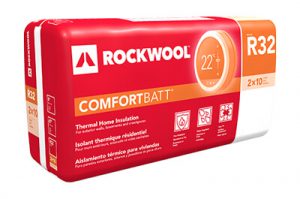
Image of Rockwool ComfortBatt still in the package

Once your studs are installed over the insulated sheathing board, it’s time to insulate between the studs with a stone wool insulation like ROCKWOOL Comfortbatt®. This probably looks more like the insulation you’d had in your mind — light, semi-rigid pieces that compress when they’re inserted into the walls.

To install, simply compress the batts, insert them into the stud cavity, and release for a friction fit. Even if you give it a slight tug, it should stay firmly nestled between the studs.

Hit the finish line.

By combining the ROCKWOOL Comfortboard® 80 and the ROCKWOOL Comfortbatt®, you can achieve code-compliant performance that’s going to keep your basement warm and comfortable year-round.

Depending on your climate zone, you may be required to install a vapour barrier (consult local building codes to be sure). If it’s a requirement in your area, simply install the vapour barrier using the manufacturer’s specifications and be sure to seal it up properly with code-approved tape. Now you’re all ready to drywall — and you know we can help with that, too! 😉

Ready to insulate your basement? Yes! You’ve got this! Be sure to stop in and see us at your local TIMBER MART, and we’ll get you organized with everything you need.

How the right lighting can make all the difference

Unless you’re building from scratch with a sharp eye for details, most homes come equipped with basic lighting that doesn’t come close to meeting our day-to-day needs.

Inadequate lighting can make a space feel gloomy, cold and even grungy, but the right lighting can take a space to the next level — illuminating the parts that need to be highlighted with exactly the right colour temperature, in the right way.

From bendable LED strips, recessed lights trimmed in aluminum, and all the bells and whistles you can imagine, here’s a closer look at how — and why — the right lighting can make all the difference…

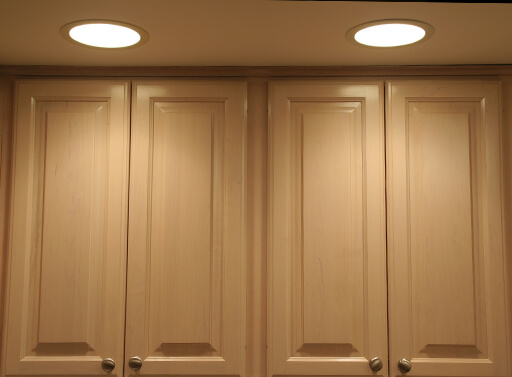
A picture of 2 recessed lighting examples

Recessed lighting.

There’s a reason this style of lighting never goes out of style. Recessed halogen lights produce bright, clean light that shines exactly where you need it — illuminating countertops, furniture, cabinet interiors or specific spots in a room. You can even add personality to these surface-mounted and recessed halogen lights with trim rings — available in different colours and finishes — so they blend in seamlessly with your decor.

Task lighting.

Your kitchen might seem like it has enough light, but you won’t believe the difference if you add task lighting to the spots you use most often — like the island or peninsula where you do most of your meal prep. Having dedicated, focused light in these areas can completely change the feel of a room. Try a cool-burning Xenon bulb that casts white, natural-looking light and lasts up to 20 times longer than halogen bulbs.

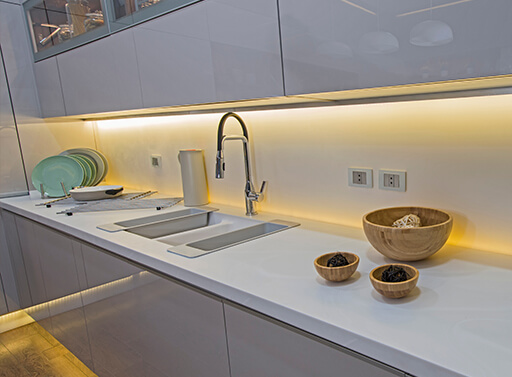
Flexible lighting LED strip underneath kitchen cabinets

Flexible lighting.

Sometimes a little flexibility is key, even where lighting is concerned. We love the new flexible tape lights that can be moulded to fit anywhere you need them — whether that’s curving around a rounded wall, following the lines of a piece of furniture or highlighting a unique feature. They’re easy to install using plain mounting tape or screws, and the LEDs provide long-lasting, consistent lighting that won’t overheat.

Display lighting.

When it comes to displaying special items, many people prefer the reliability of long-lasting fluorescent lighting. Features like motion sensors make it really functional for home or commercial use, and you can choose from different colour temperatures to customize the glow. (Hint: warm white tones make fluorescent feel more like incandescent light.)

But it isn’t just the lighting itself that can make a world of difference in your space — it’s the technology behind it that makes it even easier to use.

Make your lighting work for you with a classic slide dimmer or multi-channel remote control, or take things up a notch with the Decora® switch powered by Bluetooth® that lets you adjust the lighting using an app on your phone. Use an infrared proximity sensor to automatically flip on the lighting when someone gets within range, or use the Call Me wireless switch to remotely adjust your favourite LEDs.

Ready to light up your world? Pop into your local TIMBER MART and we’ll be happy to help you get started.