Every varnish-pro has their own tricks and tips to make their brightwork beautiful. TIMBER MART checked in with a mariner who sailed aboard Canada’s iconic schooner, Bluenose II; where flawless wood finishes help keep this piece of Canadian heritage afloat. Here is one sailor’s recipe for a varnish job applicable to any wood surface.
Evaluate
Always begin by evaluating the condition of the wood. Is it dry? Is the last varnish job bubbling or flaking? Are there visible brush strokes or drips from previous jobs? An initial evaluation will provide insight on the amount of time and material necessary to complete the job. If you are varnishing with a previously used brush how clean is it? Ensure the bristles have a thorough cleanse, are soft, and don’t have a tendency to fall out.
Of course, it is necessary to do a workplace scan. Check for proper ventilation, and eliminate hazards in your area. Be mindful of the temperature and humidity. If it is too warm in your workspace, varnish could dry from the top-down, verses bottom-up. Avoid this! An ideal temperature ranges between 15 °C and 25 °C.

Prepare
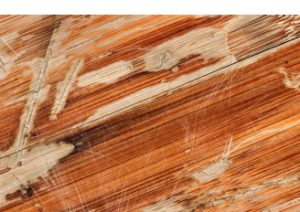
If the previous varnish job is flaking, bubbling or cracking, begin by scraping the imperfections away. Apply a light pressure; keep the blade flat on the wood surface and move with the grain.
Next, move onto sanding. Typically a 120 grit sandpaper works well if the wood is in fair condition. Pay particular attention to scraped areas and ensure they are smoothed out. Always use a sanding block to avoid forming uneven surfaces and sand with the grain. Once the surface has been sanded with 120 grit paper, decide whether it is smooth enough or if additional sanding will be beneficial. If so, move to a finer paper.
Once scraping and sanding are complete, dust away the sand using a dry cloth, and then wipe down surfaces with a cleanser. Finally, use waxed cheesecloth to remove sanding dust from grooves and cracks.

Apply
Now it’s time for the fun stuff – varnish. Inside the Bluenose II paint locker lays a sea of green cans – Minwax® Helmsman® is the secret ingredient to keeping the 180 foot wooden vessel in ship shape. Penetrol is another great product that will help varnish stick, it protects against weathering and it enhances coverage.
Have a rag handy, wet the first few centimeters of your brush, and remove access varnish. Use a gentle hand as you begin application, take long strokes with the grain and use the entire width of the brush. Always work back into your strokes to prevent identifying where brush strokes begin and end. When beginning a new section, overlap slightly with the above strokes that are still wet. This technique helps eliminate the appearance of brush strokes and reduces the number of “holidays” (missed areas).
Allow your new coat of varnish to dry, and then determine whether additional layers are required. Between two and four coats are often added on both exterior and interior pieces. Sand and cleanse before each new coat and use finer sandpaper (180 or 220 grit) as the quantity of coats increase.
Once your feel your hardwood gleams like glass, tidy up and enjoy the fruits of your labour!

Source: Kristin Boyd


