


There may be dozens of newer flooring options available, but many experts agree that there’s just nothing like a classic tile floor. It’s durable, easy to maintain for years, and looks great.
Ready to get started? Before you strap on your kneepads and start mixing up that mortar, here are five essentials you should pick up.
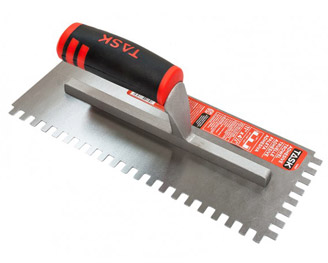
1. A trowel or adhesive spreader.
One of the most important tiling tasks is applying your thinset (a cement-based mortar). This is what’s going to “stick” your tiles to the floor, so it’s important to do it carefully. Otherwise, your tile isn’t going to have a solid foundation.
Adhesive spreaders are flat and can be uncomfortable to hold for long periods of time, whereas trowels have a cushioned handle that’s designed for comfort.
Thinset can’t be applied with a paintbrush or a smooth scraper – you need a trowel with little notches that will make a ridged pattern in the creamy material. These ridges in your thinset allow the tile to bond snugly because air can escape as the tile sets.
There are trowels with V-shaped notches, jagged sawtooth notches, and square notches of all sizes. But which trowel is right for which tiling job? It’s actually pretty easy to tell.
V-shaped notch trowels or sawtooth notch trowels are better for tiling walls, since they’ll apply less thinset and you’ll avoid over-smearing. Square-notched trowels are better for floors, and there are plenty of different sizes for a reason: the size of the notch should equal the thickness of your tile. Thinner tile means a smaller notch.
Remember to spread the thinset with the smooth edge of your trowel, and then go back over it with the notched edge to make those ridges. This is called “combing.”
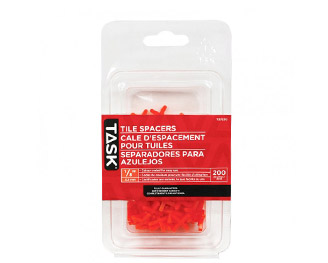
2. Tile spacers.
You can’t tile a floor without these tiny plastic lifesavers – unless you’re not going for the straight, even look. They’re inexpensive and come in various sizes, so it’s just a matter of figuring out the distance you’d like between each tile.
Some tile experts believe smaller rooms should use smaller spacers because you can incorporate more tile – making the room look more spacious. But in other cases, spacing the tiles further apart could save you from making a lot of frustrating cuts.
As a general rule, the smaller tile spacers (1/16” and 1/8”) are used when tiling walls, and the larger tile spacers (3/16” and 1/4”) are for tiling floors. This is because floor tiles need more breathing room as they’re more likely to crack or buckle if they’re placed too closely together.
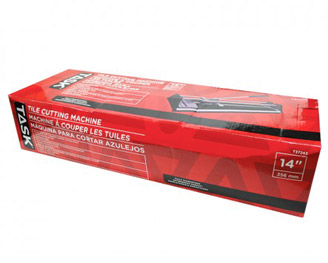
3. Tile-cutter and/or tile nippers.
It would be nice if every tile could be placed without any adjustments, but that’s usually not the way it works when you’re laying a floor. There may be vents to go around and corners to finesse, not to mention all of the edges of the room.
Depending on your job, you may be able to get away with a pair of tile-nipping pliers (or a pair of tile-cutting pliers and a scoring wheel. But in a lot of cases, it’s wise to invest in a tile-cutting machine or a circular tile cutter, especially if you’re going to be tackling other tile jobs.
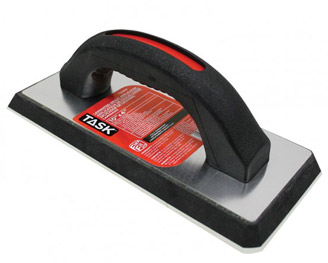
4. A grout applicator.
It may look sort of similar to your trowel, but it’s very different. A grout applicator is light, smooth and flexible – without the notches of a trowel. Its job is to smooth the grout into the nooks and crannies between every tile.
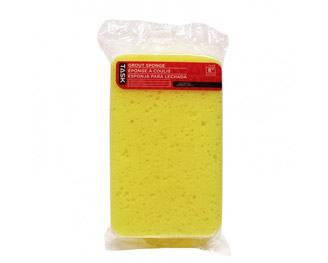
5. A grout sponge.
The final step of your floor-tiling job is going to be to run a wet sponge over your grout to clean up any excess. It might take two or three rounds of wiping before your tiles are completely free of grout residue. You can buff off any leftover film later with a soft cloth.
…
With a little prep and a lot of patience, you’ll have a gorgeous tiled floor sparkling up at you in no time.
We’re always here if you have questions about a product or how to use it, so don’t be shy about asking.